How to make Snake in JavaScript using <canvas> in 2019
(with pictures and source code)
Table of Contents
- Chapter 1: Setting up the source file
- Chapter 2: A possible structure of a game in JavaScript
- Chapter 3: Conclusion and important Notes
- Chapter 4: Source Code
- Chapter 5: Bug Report
This code was tested on Google Chrome but it should (usually) also run on other browsers.
Hey folks! This is a short tutorial how a simple version of Snake can be made in pure JavaScript. We will discuss in detail, how a game is structured in JavaScript and we will use the strong <canvas>-tag, to create a "game field" and the game itself. This project was made for my internship as a teacher at HTL Fürstenfeld, since I promised my students that I will show them, how we can make games in Javascript. However, we had insufficient time. This is why I decided to post a tutorial online step-by-step. Rules for this version of Snake:
- We start with a green snake, that has by default four blocks (length)
- The snake can be controlled using the arrow keys on your computer (Desktop only)
- We have to implement a red apple, that spawns randomly in our game field
- When the snake eats an apple, it gets bigger by one block
- The game is lost when the players' snake "eats" itself or hits the edges
All you need to follow this tutorial is some basic understanding of JavaScript and an editor of your choice. Alright, then let's start!
Chapter 1: Setting up the source file
Firstly, we need to setup our programming environment. All you need to do is to create an empty file named snake.html.
After you have created that, fill it:
<!DOCTYPE html>
<html>
<head>
<title>Snake in JS</title>
<meta http-equiv="content-type" content="text/html; charset=UTF-8">
</head>
<body style="background-color: black; color: white;" onload="gameLoop()">
<h1>Simple Snake in JS</h1>
<p>Use your arrow keys ← → ↑ ↓ to control.</p>
</body>
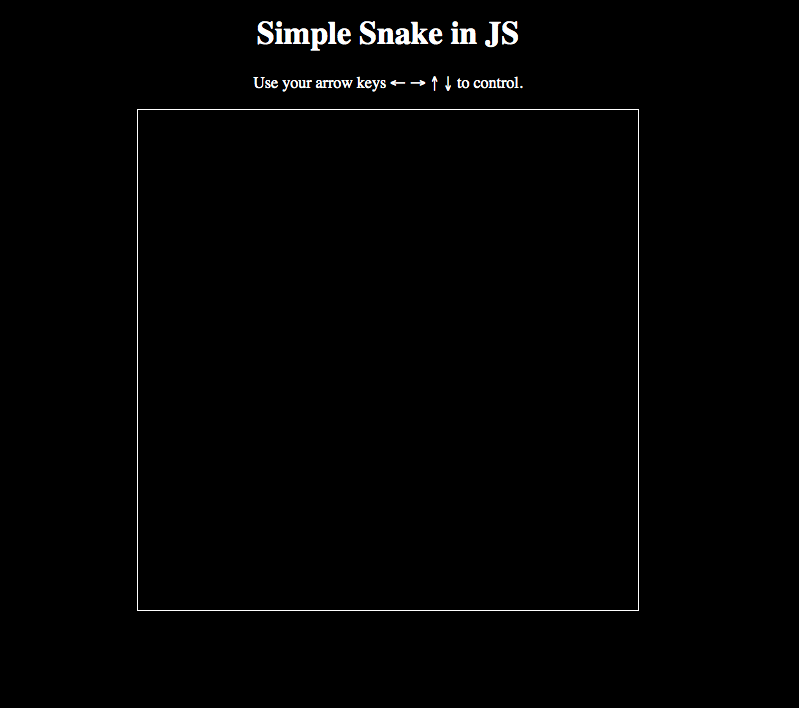
</html>I guess this is all self explainatory, just a simple html file with the background set to black, the font-colors set to white and the whole page is displayed in the middle. It is also declared, which script-function the page must "open" after loading the website (gameLoop()) - this is the starting point of our game later. Then there is a small heading with the title "Snake" and a small description, how you can control the game.
Next, we have to setup the game field. Here, we can use the <canvas>-element to generate a game field in html, that we can later work with in JavaScript. Just add the following line after the description (after closing paragraph tag):
<canvas id="game" width="500" height="500" style="border: 1px solid white;"></canvas>This will create a 500x500 rectangle with the id-name "game", that will be our game field. The border-declaration marks the end of the "game field", so we can see how big our game field actually is.
After that we will add the actually script, that has all the game logic. We put the script after the canvas tag. We will write the script directly in html but if you prefer to bin the script, you can do so (just simply add src="myscript.js").
<script type="text/javascript">

    // variable declarations

    function gameLoop()
    {
        // our code
    }

</script>
The gameLoop() will be the first function that will be called when the page is loaded.
Alright, we are done with chapter one, now "real" programming starts.
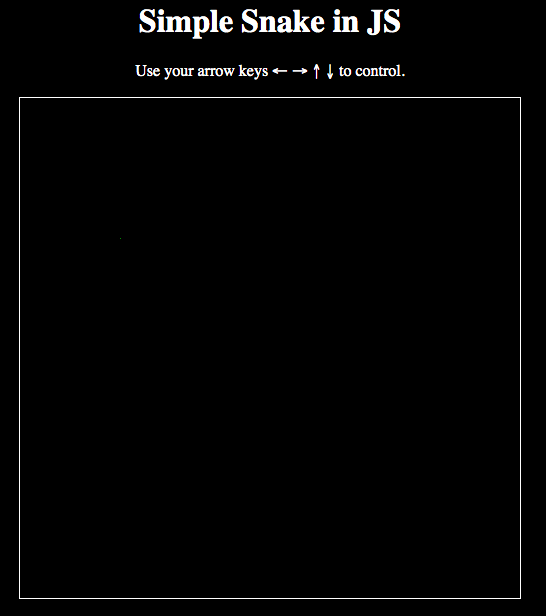
Till now, your result should look like this:
Chapter 2: A possible structure of a game in JavaScript
Every game has some sort of loop, since a game runs "endless" till it is closed (or lost, or paused etc.). Every time a loop is passed, the image (frame) will be update (rendered) - this happens in some amount of time, called Frames per Seconds (FPS). During the runtime (i.e. gameLoop() runs), we expect input from the user (like pressing a key) - this is called an event. When the user e.g. moves something, the image must be updated since the position of an object has changed.
That is basically the theory behind game loops. This means we nee to implement the following:
- A game loop that always loops, till the game is lost/over (The Game Loop)
- Some sort of function, that "listens" when a button is pressed (The Event Listener)
- A function, that updates the new position of the object, after a button was pressed or something happened. E.g. an apple was eaten or the moving direction of the snake has changed (Game Logic)
Let's discuss 1. (game loop) first.
Chapter 2.1: The Game Loop
Change your <script>'s-content to this:
<script type="text/javascript">
    // variable declarations
    let counter = 0;

    function gameLoop()
    {
        counter++;
        alert("Hello Loop: " + counter);
    }
</script>
A note to my students: We simply declared a variable called counter initialized with the value 0 using the keyword let which is better than var to declare integers since with var we also need to change the variable to type integer using parseInt() - the let keyword does that for us without declaring parseInt() explicitely. Using let it declares x as "let x be 0".
Now run the website - what's the problem? Right, the loop only runs one time instead of running infinite. To fix this, change your <script>'s-content to the following. After that, refresh the website and see what happens:
<script type="text/javascript">

    // variable declarations
    var id;
    let counter = 0;
    let canvas = document.getElementById('game'); // get the canvas element
    let context = canvas.getContext('2d'); // "type of game" (2D or 3D)

    function gameLoop()
    {
        id = requestAnimationFrame(gameLoop);
        counter++;
        alert("Hello Loop: " + counter);
    }

</script>
As you can see, the loop now runs infinite and tells you, how many times it looped. Let's analyze the code we wrote:
- we declared a variable named
canvasthat stores our <canvas>-tag html properties (e.g. width). We access to those information using thegetElementById()method. - from that new
canvasvariable, we declare acontextvariable, that tells the web page which type of game we develop. - the
requestAnimationFrame()method calls recursively ourgameLoop()and returns an id (which is needed to exit the loop - more on that later). This part is a little difficult to understand, let's just say using this line of code the functiongameLoop()will be called over and over again, after it finished its current turn. - Note: This three tasks are typical for JavaScript game development and you find these declarations in (nearly) every html/javascript games' source code.
Until now, there is no possibility to quit the loop. To implement this, we ask the user everytime to input something (doesn't matter what he writes, just a random letter/string from the keyboard). If the user typed nothing (e.g. left the prompt() empty and just hit "OK") we stop the loop.
Add the following after the //variable declarations:
var inp = " "; // some misc characterAnd the following after alert:
inp = prompt("Input: ", "");
if(inp == "")
{
    cancelAnimationFrame(id);
}
Now if you run the code, the website always first tells you the current loop and asks then for an input. If you type nothing as input (e.g. just hit "OK"), it stops calling gameLoop() recursively and therefore cancels the loop.

We can transfer this process to our actual game: The "alert-part" is the "player" (=snake) and the "prompt-part" is the "event listener" (=keyboard input).
After that we also need something like an updateGame()-function that updates the new positions, after an event occured.
Now, let's implement the "alert-part" - the snake.
Implementing the Snake
To draw the snake, we need information:
- The starting position of the snake (x and y)
- the actual snake
- the moving position (left, right, up, down)
- the current length of the snake, starting with 4 blocks
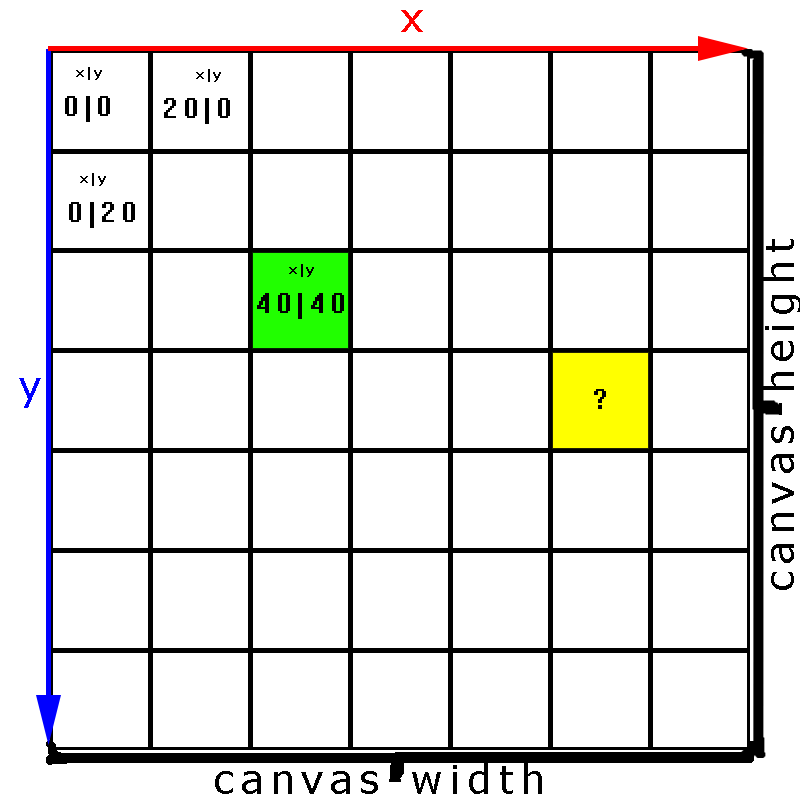
The <canvas> element made a 500x500 game field. The "content" of the <canvas>, where the actually game is "drawed", can be accessed. Every Pixel in the 500x500 canvas has a x and y value - like in a coordinate system. The coordinate system looks like this:
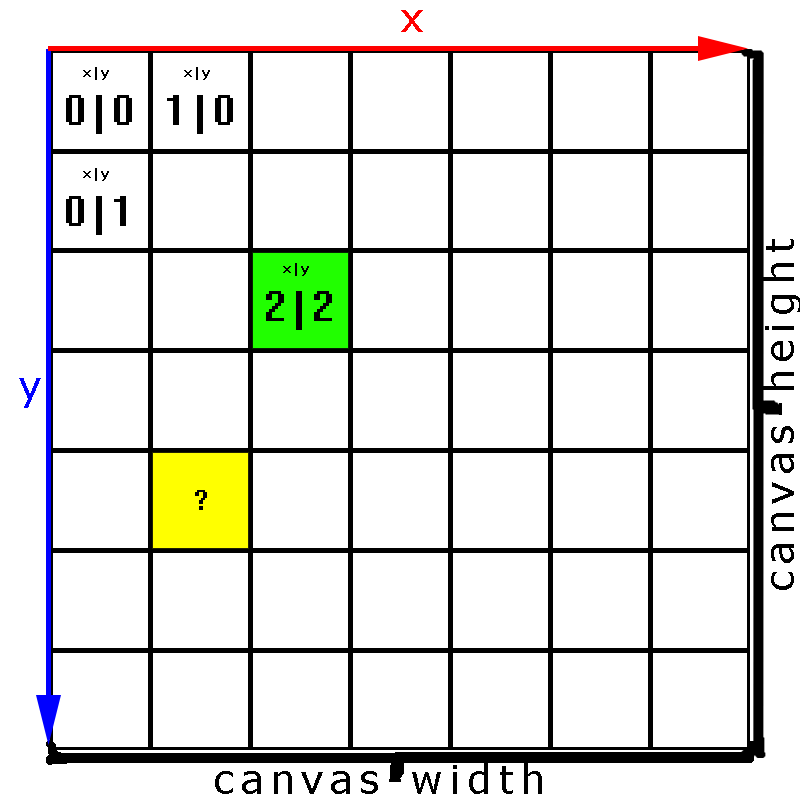
Little task 1: What are the coordinates of this yellow pixel?1
As you can see the "first pixel" is placed in the top left corner with (coordinates) 0|0 (x = 0, y = 0) and the "last pixel" is placed in the bottomm right corner width-1|height-1 which is 499|499 (x = 499, y = 499) in our case.
So we can actually pick any number for x/y which is between 0 and 499 for the starting position of the snake. Let's say we set the snake to x = 100 and y = 140.
Add the following unter //variable declarations:
let x = 100;
let y = 140;
After that, we need a variable that "stores" the snake. What I mean by that is that the snake can be represented as a green pixel in the game field. We need some "sort of list", where we can store all x and y values for each pixel (=block of snake) that should be colored green, whick represents the snake. Also, this values change after every loop-run, so the "sort of list" will be changed every loop. Furthermore, this "sort of list" has to be dynamic. What I mean by that is, that a new entry can be easily added, since the snake gets bigger after an apple has been eaten. In JavaScript we can use dynamic arrays for that. For each pixel, we store first the x-value, then the y-value.
Note: If you don't know how arrays work, check this short article and make some examples - it is really not that hard.
To declare a dynamic array, add the following under the x and y declaration in the variable declarations sections:
let snake = [x, y];What happenend here? As said previously, the values (x and y) of the first pixel is stored on the beginning of the array. Now if we wanna draw the pixel (make it green), we just
need to make alle pixels with coordinates x|y green. snake[0] (=x0) and snake[1] (=y0) represent the "head" of the snake.
In our function gameLoop we add another function (sub program), that always should calculate the new position of the pixels from the array snake[]
so that Code looks like this until now (Note: also remove alert("Hello Loop: " + counter);, let counter = 0; and var inp = " "; from your code since we don't need it anymore):
<script type="text/javascript">

    // variable declarations
    let canvas = document.getElementById('game');
    let context = canvas.getContext('2d');
    let x = 100;
    let y = 140;
    let snake = [x, y];

    function gameLoop()
    {
        id = requestAnimationFrame(gameLoop);

        updateSnakePositionAndLength();
    }

    function updateSnakePositionAndLength()
    {
        // give the "latest value" to x and y = the "head of the snake"
        x = snake[0]; // x0
        y = snake[1]; // y0
    }
</script>
Next up, we need to actually draw the green pixel, we just implement another function named renderEverything() that draws our
pixels with coordinates x and y from snake[] array. Add the following code (Note: also remove alert("Hello Loop: " + counter);, let counter = 0 and var in = " " from your code since we don't need it anymore):
// Add this under `updateSnakePositionAndLength();` in `gameLoop()`:
renderEverything();
.
.
.
// Add this codeblock under the function `updateSnakePositionAndLength`
// draw snake
context.fillStyle = 'green';
for(let i = 0; i < snake.length; i = i + 2)
{
context.fillRect(snake[i], snake[i+1], 20, 20);
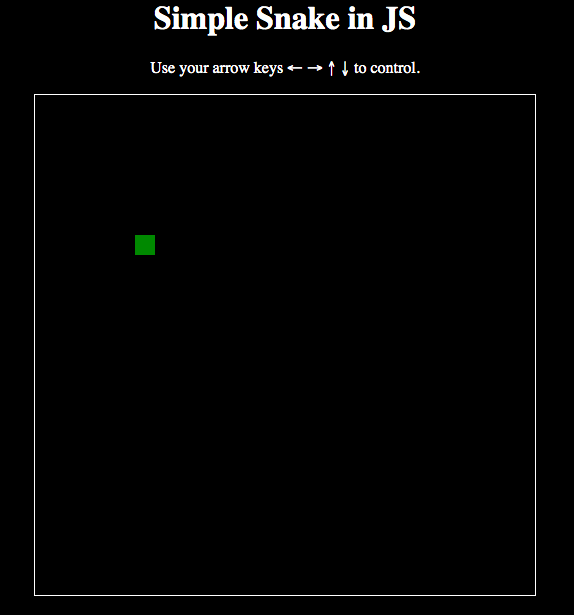
}This should be the result:
You might ask yourself why we need this for-loop. We need it later, when we want to draw all blocks of the snake. Remember they begin with four blocks and can then get infinite bigger, till the game is lost. The loop is pretty simple. As said, we store both x and y values from the snake, what has to be drawn. Since there can be more then one entry, we declared a loop, that prints every pixel to our game field. the first position is always i (x) and the next one is i+1 (y). Then we move to the next x/y entry - the next x-entry can be accessed by i+2. It prints all x/y-values, that are stored in the array (snake.length).
Congratulations, you drawed your first (small) pixel to the game field! Now let's analyze how that's done. First, using our context variable, we set the color, wanna draw. In general, the variable context is used to "draw stuff" on the screen. Next up we say, we wanna fill up an rectangle. This method is structured like so: fillRect(<coordinates x>, <coordinates y>, <width size>, <height size>). First, the methods gets the x and y position, where it has to be drawn. Secondly, since we only want to draw a 1x1 pixel, we set the both witdh and height to 1. That's all the magic behind it.
Yeah I know what you mean: "This is by far too small". I agree, it is too small, this is why we "scale up" the whole game fiel by a factor of 20. We can achieve this by changing the width and height to 20:
context.fillRect(snake[i], snake[i+1], 20, 20);Result:
With this change, we say that "one pixel" has now a size of 20x20 instead of the (standard) one by one. This graphic shows our "new coordinatesystem":
Another little task 2: What are now the coordinates of this yellow pixel? 2
Until now, this should be your content of index.html - compare it with your result if everything is correct:
<!DOCTYPE html>
<html>
<head>
<title>Snake in JS</title>
<meta http-equiv="content-type" content="text/html; charset=UTF-8">
</head>
<body style="background-color: black; color: white; text-align: center;"
onload="gameLoop()">
<h1>Simple Snake in JS</h1>
<p>Use your arrow keys ← → ↑ ↓ to control.</p>
<canvas id="game" width="500" height="500" style="border: 1px solid
white;"></canvas>
<script type="text/javascript">
// variable declarations
let canvas = document.getElementById('game');
let context = canvas.getContext('2d');
var id;
let x = 100;
let y = 140;
let snake = [x, y];
function gameLoop()
{
id = requestAnimationFrame(gameLoop);
updateSnakePositionAndLength();
renderEverything();
}
function updateSnakePositionAndLength()
{
// x and y = the "head of the snake"
x = snake[0]; // always x0
y = snake[1]; // always y0
}
function renderEverything()
{
// draw snake
context.fillStyle = 'green';
for(let i = 0; i < snake.length; i = i + 2)
{
context.fillRect(snake[i], snake[i+1], 20, 20);
}
}
</script>
</body>
</html>Alright, now we have a drawed snake! I know it is just literally a pixel, which we can not even move, and a snake is usually represented bigger than one pixel but let's keep it like that for now and implement the next step "Movement": 2. Event Listener.
Chapter 2.2: Event Listener: Moving the snake with your keyboards' arrow keys
First of, we know that the snake can be moved into four directions: left, right, up, down - so let's implements four variables, that store the current moving position.
Add the following under your declarations:
var left = false;
var right = true;
var up = false;
var down = false;
We can check the direction by making a simple if (or switch case), in which direction the snake is currently moving - then we update the pixels.
In the beginning, before the user presses a button, the snake's position is set to right, this is why right is set to true and the rest is set to false.
This makes sense, since if would press nothing on our keyboard later, the snake would stand still.
Right, next up we add the actual event listener. Thankfully, JavaScript already has some build-in functions to determine if a key is pressed. Add the following lines of code under your last declared function as a "standalone-code":
document.addEventListener('keydown', function(event) {
    // left arrow key
    if (event.which === 37) {
        alert("left arrow key was pressed!");
    }
    // up arrow key
    else if (event.which === 38) {
        alert("up arrow key was pressed!");
    }
    // right arrow key
    else if (event.which === 39) {
        alert("right arrow key was pressed!");
    }
    // down arrow key
    else if (event.which === 40) {
        alert("down arrow key was pressed!");
    }
});
Now if you run this code, everytime you will get a message, which arrow key you have pressed. How does that work?
In JavaScript we can create something like an "eventListener"-function. This function can be declared using document.addEventListener('keydown', function(event) { //stuff });.
It asks first, which type of "pressing" should be analyzed (e.g. keydown -> if a key was pressed; or keyup -> if a key was released) - then we save this in some sort of "self-generated" function called event. After that we can ask using the .which-property, if a certain key was pressed. Keys are declared in certain numbers. E.g. the arrow-key "down" is represented by the digit-code 40. If you are interested in other key codes (e.g. what the code for "shift" means) have a look to this website.
Alright, obviously are the alerts not very helpful. Instead of alerting everytime a button is pressed we change the variables left, right, up, down depending which button was pressed - so change the events-function to this:
document.addEventListener('keydown', function(event) {
    // left arrow key
    if (event.which === 37) {
        left = true;
        right = false;
        down = false;
        up = false;
    }
    // up arrow key
    else if (event.which === 38) {
        left = false;
        right = false;
        down = false;
        up = true;
    }
    // right arrow key
    else if (event.which === 39) {
        left = false;
        right = true;
        down = false;
        up = false;
    }
    // down arrow key
    else if (event.which === 40) {
        left = false;
        right = false;
        down = true;
        up = false;
    }
});
Nice, we finally have an event listener as a prototype! Next up need to implement the actually "movement" of the snake - till now our snake just keeps "sitting" if we press a button - let's start with 3. The game logic.
Chapter 2.3: The Game Logic
We already declared a function where we can implement the moving of the snake: updateSnakePositionAndLength() - change the function to the following:
function updateSnakePositionAndLength()
{
    if(right == true)
    {
        snake.unshift(y);
        snake.unshift(x+20);

        // give the "latest value" to x and y = the "head of the snake"
        x = snake[0];
        y = snake[1];
    }

    else if(left == true)
    {
        snake.unshift(y);
        snake.unshift(x-20);

        // give the "latest value" to x and y = the "head of the snake"
        x = snake[0];
        y = snake[1];
    }

    else if(up == true)
    {
        snake.unshift(y-20);
        snake.unshift(x);

        // give the "latest value" to x and y = the "head of the snake"
        x = snake[0];
        y = snake[1];
    }

    else if(down == true)
    {
        snake.unshift(y+20);
        snake.unshift(x);

        // give the "latest value" to x and y = the "head of the snake"
        x = snake[0];
        y = snake[1];
    }
}
Hold on! I know what you are thinking - "What the hell does all this code mean?" I will discuss in detail what is going on. You will see it is not that compliacted at all. But first let's test our game. Your result should look like this:
If you are fast enough, you can also change the snakes direction:

First of you will notice that the game is running to fast. That is because we haven't declared a fixed frame rate yet. Snake is typically a more "slow"-game, so I would suggest we limit the framerate to 12FPS. We can achieve that with a simple modification in id = requestAnimationFrame(gameLoop); - Change it to the following:
setTimeout(function() {
            id = requestAnimationFrame(gameLoop);
        }, 1000 / 12);
This setTimeout() function can limit our frames per seconds to a value that we wanna like - here we fixed the framerate to 12 fps, which can be expressed with 1000 / 12.
Also in renderEverything() change the width and height to draw from 20 to 19. This will result into a "blocky effect" with something like a black border - it just looks better.
context.fillRect(snake[i], snake[i+1], 19, 19);Now test your code. You will see that your snake game is slowly getting shape:

Alright, now back to the "What the hell"-statement - how does the edited function updateSnakePositionAndLength() work? Now let's step through it:
First of, we scan in which direction the snake is moving. Remember, that we can change the direction of our snake by hitting one of the arrow keys left, right, up, down. So we have to check, which direction is yet set to true - this can be done with a simply if/else if construct (alternatively, we could also use switch(case)):
function updateSnakePositionAndLength()
{
    if(right == true)
    {
        // change position to right
    }

    else if(left == true)
    {
        // change position to left
    }

    else if(up == true)
    {
        // change position to up
    }

    else if(down == true)
    {
        // change position to down
    }
}
Alright, after one of those cases occured it has to update the new position of the snake - "the movement". Now how does that work? Let's look how it works, if the snake moves right (which is the default on beginning):
if(right == true)
{
    snake.unshift(y);
    snake.unshift(x+20);

    // give the "latest value" to x and y = the "head of the snake"
    x = snake[0];
    y = snake[1];
}
Remember, at the start before the loop starts iterating, out snake is positioned at 100|140. I edited my code a little illustrate how the pixels are drawn. It now showes you, which pixels are currently drawn and in which direction the snake is currently moving (nothin special). To achieve the same, change your code as followe:
// declare a frame counter varible under the declarations sections
let frame = 0;
Then change your complete gameLoop()-function to this:
function gameLoop()
{
    // initial values ("frame 0")
    if(frame == 0)
    {
        console.log("Loop printing frame " + frame);
        console.log("Starting values:");
        console.log("x = " + x + " | y = " + y);
        console.log("Starting direction: right");
        console.log("\n\n");
    }

    setTimeout(function() {
        id = requestAnimationFrame(gameLoop);
    }, 1000 / 0.5);

    updateSnakePositionAndLength();

    renderEverything();

    // show next rendered frame values
    frame++;
    console.log("Loop printing frame " + frame);
    if(right == true)
    {
        console.log("Current direction: right")
    }
    else if(left == true)
    {
        console.log("Current direction: left")
    }
    else if(up == true)
    {
        console.log("Current direction: up")
    }
    else if(down == true)
    {
        console.log("Current direction: down")
    }

    for(let i = 0; i < snake.length; i = i + 2)
    {
        console.log("x["+i+"]: " + snake[i] + "| y["+(i+1)+"]: " +
        snake[i+1]);
    }
    console.log("\n\n");
}
Again every loop iteration represents one frame. I set the FPS to 0.5, just to see better, what is changing/drawed in every loop. Then a simpple if/else construct tells us, in which direction the snake is currently moving. Using a for-loop, we print out all numbers that are stored into the snake[] array. Remember: Every x/y coordinate that is stored in the array, will be drawed.
Now let's fire up the developing tools in chrome and look for the console output:
When everything is initalized, we are at "frame 0". When the iteration begins, it starts to update the blocks according to the current direction.
The direction in "frame 1" was right, so we have to get to the right next block. How do we get there? Right by adding +20 to our x-value ("+x"), the y-value keeps untouched.
And this is already happening. With the .unshift() method 3 we put two new entries on the beginning of the array. First comes the y-value then the x-value, which is also added by 20 since we want to go to the next pixel/block: After this action, the array looks like this:
//          frame1    frame0
//          x1   y1   x0   y1
snake[] = { 120, 140, 100, 140 };
You can also check that in the console:

That's all the magic behind this. Of course we can expand this idea also with left, up, down, we just have to sub/add differently:
left: means "-x", which is why we wrotex-20.ystays the same.up: means "-y", which is why we wrotey-20.xstays the same.down: means "+y", which is why we wrotey+20.xstays the same.
If you understand this principle then you have won since this "concept" can be found on a lot of (2D) games. Maybe implemented differently, but still found similar. Alright, the basis is set congratulations! Now it's time for the fine tuning - this involves:
- Defining a
max_length_snake-variable which gets bigger, when the snake "ate" an apple. - Spawning random red apples
- Collision detection (eating red apples and if the snake touches the edges or if the snake "eats" itself).
We will implement these in 2.4.
By the way, you can delete change your code back to normal by setting the framerate back to 12 and removing the additional code from the previous examples since it was only for demonstrative purposes. You can compare your result with mine below:
<!DOCTYPE html>
<html>
<head>
<title>Snake in JS</title>
<meta http-equiv="content-type" content="text/html; charset=UTF-8">
</head>
<body style="background-color: black; color: white; text-align: center;"
onload="gameLoop()">
<h1>Simple Snake in JS</h1>
<p>Use your arrow keys ← → ↑ ↓ to control.</p>
<canvas id="game" width="500" height="500" style="border: 1px solid
white;"></canvas>
<script type="text/javascript">
// variable declarations
let canvas = document.getElementById('game');
let context = canvas.getContext('2d');
var id;
let x = 100;
let y = 140;
let snake = [x, y];
var left = false;
var right = true;
var up = false;
var down = false;
function gameLoop()
{
setTimeout(function() {
            id = requestAnimationFrame(gameLoop);
        }, 1000 / 12);

updateSnakePositionAndLength();

renderEverything();
}
function updateSnakePositionAndLength()
{
    if(right == true)
    {
        snake.unshift(y);
        snake.unshift(x+20);

        // give the "latest value" to x and y
        x = snake[0];
        y = snake[1];
    }

    else if(left == true)
    {
        snake.unshift(y);
        snake.unshift(x-20);

        // give the "latest value" to x and y
        x = snake[0];
        y = snake[1];
    }

    else if(up == true)
    {
        snake.unshift(y-20);
        snake.unshift(x);

        // give the "latest value" to x and y
        x = snake[0];
        y = snake[1];
    }

    else if(down == true)
    {
        snake.unshift(y+20);
        snake.unshift(x);

        // give the "latest value" to x and y
        x = snake[0];
        y = snake[1];
    }
}
function renderEverything()
{
// draw snake
context.fillStyle = 'green';
for(let i = 0; i < snake.length; i = i + 2)
{
context.fillRect(snake[i], snake[i+1], 19, 19);
}
}
document.addEventListener('keydown', function(event) {
// left arrow key
if (event.which === 37) {
left = true;
right = false;
down = false;
up = false;
}
// up arrow key
else if (event.which === 38) {
left = false;
right = false;
down = false;
up = true;
}
// right arrow key
else if (event.which === 39) {
left = false;
right = true;
down = false;
up = false;
}
// down arrow key
else if (event.which === 40) {
left = false;
right = false;
down = true;
up = false;
}
});
</script>
</body>
</html>Chapter 2.4: Final touches
Chapter 2.4.1: Limiting the snakes length
Alright, let's start with the length of the snake. Till now, we always drawed every pixel that is stored in the snake[] array. But of course, it should only draw the current amount of allowed blocks - which is in the beginning four (in my case). So we have to implement something, that if the array length is bigger than the max_length_snake that it deletes the "last" value and makes that pixel back to the color of the gamefield (which is black). If you look at the structure of our gameLoop(),
setTimeout(function() {
id = requestAnimationFrame(gameLoop);
}, 1000 / 12);
updateSnakePositionAndLength();
renderEverything();it makes sense, that this "check" is made before the rendering() process. In fact, we can perform this action directly in the updateSnakePositionAndLength() function.
Ok, let's first declare a max_length_snake variable, which holds a value that indicates the length of the snake at the beginning (add this under the declarations section):
let max_length_snake = 4; // starting length of snakeIf we look in the updateSnakePositionAndLength() function, we see this:
function updateSnakePositionAndLength()
{
if(right == true)
{
snake.unshift(y);
snake.unshift(x+20);
// give the "latest value" to x and y
x = snake[0];
y = snake[1];
}
else if(left == true)
{
snake.unshift(y);
snake.unshift(x-20);
// give the "latest value" to x and y
x = snake[0];
y = snake[1];
}
else if(up == true)
{
snake.unshift(y-20);
snake.unshift(x);
// give the "latest value" to x and y
x = snake[0];
y = snake[1];
}
else if(down == true)
{
snake.unshift(y+20);
snake.unshift(x);
// give the "latest value" to x and y
x = snake[0];
y = snake[1];
}
}Under the last else if-condition block ("else if(down == true)") add the following function:
checkMaxLength();This function will be called regardless in which direction the snake is currently moving which makes sense, since we want the snake to keep its maxlength careless of its direction.
Then we declare our new function checkMaxLength():
function checkMaxLength()
{
    if(snake.length / 2 > max_length_snake)
    {
    // delete the latest entry
    snake.pop(); // deletes y
    snake.pop(); // deletes x

    // makes the whole screen "black" - then draw again the
    // green things that are supposed to be here
    context.clearRect(0, 0, canvas.width, canvas.height);

    }
}
Let's investigate this function:
- You might ask why I wrote
snake.length / 2 > max_length_snake- as said previously we check if the array length is bigger thanthe max_length_snake. Since our array is always 2 times bigger than themax_length_snakebecause it holds bothxandyvalue of each pixel we have to dividesnake.lengthwith 2. That's why. snake.pop();deletes the latest value of the array. So on the first call it deletes y, than x which is "one pixel". This makes sense because in therendering()function we said that every pixel (its x and y) which is in thesnake[]array should be drawed.- Lastly, we make this strange
.clearRect()call. It's purpose is to "delete" all current pixels at the game field i.e. it sets the color back to black. This is needed to actually delete the now unused pixels since they would be still drawn from the previous iterations. It really makes everything black, because later in therendering()function the updated green pixels will be drawed anyway.
Now we finally have a valid moving snake:
Next up we implement the random spawning red apples.
Chapter 2.4.2: Spawning random red apples
This task is quite simple: We just need to set x and y values to random values between 0 and 499. Here, we can use one of the standards Math.random(). We will also use Math.floor() to round the result, since we don't want floating numbers. First of we need two new variables (I named them apple_x and apple_x) holding the x and y values of the apple and we need a new variable called apple_eaten and set it to true. Why true you might ask - well it is because we tell the programm the apple was already eaten and apple_x and apple_y get new random values right at the start - this is also why apple_x and apple_y are "empty" at the start since they will get the values after the first iteration. This is just "my" method, you could also set the "starting" apple to a "fixed starting position" and set apple_eaten to false. But if you want that the apple spawns also at the start differently, you should/could it implemented like I did:
let apple_x;
let apple_y;
var apple_eaten = true;
We need the variable apple_eaten to check (Collission detection) if an apple was eaten later so if so we can spawn another random apple.
Right, next up we implement the actual "rendering" of the apple - we can add this to the already existing rendering() function to keep our code nice and structured:
function renderEverything()
{
    // draw snake
    context.fillStyle = 'green';

    for(let i = 0; i < snake.length; i = i + 2)
    {
        context.fillRect(snake[i], snake[i+1], 19, 19);
    }

    /* add this below to your existing function: */

    // draw random apple
    if(apple_eaten == true)
    {   //                 end number    starting number  "block multiplier"
        //                       |                 |               |
        //                       -------------|    |     |---------|
        //                                    v    v     v
        apple_x = Math.floor((Math.random() * 25 + 0)) * 20;
        apple_y = Math.floor((Math.random() * 25 + 0)) * 20;
    }

    apple_eaten = false;
    context.fillStyle = 'red';
    context.fillRect(apple_x, apple_y, 19, 19);
}
Before I go through all the details let's see the actual output:
Alright, now discuss the details:
- First of, we ask if an apple was eaten. Since at the beginn ing
apple_eatenis set totruethe condition is satisfied and it will then create two random x and y for the apple. - We need both valid
xandyvalues, this is why we need to assign both with the same. Math.random()outputs a number between 0 and 1 (incl. 0 but without 1). Since that is not helpful, we declare a "end" number which is adding* 25. You might ask, why is 25 and not 500 the "end number"? Remember, this is because we scaled up our grid by a multiplier of 20. Our grid is 500. So we have in each row 500 / 20 pixels, which is 25. That means, the latest last pixel is 25 (see the graph under "new coordinatesystem"). The+0could be left out, but I always declare it as an "starting number" in case i want to set the starting number to another value (e.g. 1 or 5 or 10 etc.). Let's make an example to this:- Let's say
Math.Random()returns the number 0.35839200126 - This number will be multiplied by 25 - which is: 8.9598000315
- since we don't want floating numbers, we use
Math.floor()to round our value which give is the number 9 - at the end we calculate 9 * 20 which is 180 and a valid "output coordinate" to our coordinate system.
- At the end, we set
apple_eatentofalse. Why? Because we wan't only a new "spawned" apple if it was eaten (apple_eaten = true). Without this condition a random apple would be spawned after every loop iteration. - In the end we set the color to red and fill the pixels (x and y) which the apple has. Rememer that in every iteration this will be "overrided" (same as snake).
At last you might ask, why the red apple "overlays" if we drive over with out our snake. This is because we render first the snake and then the apple. E.g. we would change the order to this:
function renderEverything()
{
    context.fillStyle = 'green';
    for(let i = 0; i < snake.length; i = i + 2)
    {
        context.fillRect(snake[i], snake[i+1], 19, 19);
    }

    if(apple_eaten == true)
    {
        apple_x = Math.floor((Math.random() * 25 + 0)) * 20;
        apple_y = Math.floor((Math.random() * 25 + 0)) * 20;
    }

    apple_eaten = false;
    context.fillStyle = 'red';
    context.fillRect(apple_x, apple_y, 19, 19);
}
The snake would "overlay" the apple if they share the same x/y coordinates (just test it). This might not matter in our case because if the snakes head is the same as the apple, we would say it has been "eaten" and would (later) spawn another apple. And this is what we make next.
Chapter 2.4.3: Collision Detection
Collision detection is the computational problem of detecting the intersection of two or more objects. While collision detection is most often associated with its use in video games and other physical simulations, it also has applications in robotics.
Source: Wikipedia
In here we will also implement a "Game Over" mechanic using the cancelAnimationFrame(id) method mentioned above.
In our variant, We have three possible collisions:
- The snake ate an apple -> the snake gets bigger
- If the snake touched one of theedges -> the game is lost
- If the snake "ate" itself -> the game is lost
We will make this checks all inside a simple function called collisionDetection() which, again, we implement before the rendering() function.
function gameLoop()
{
    setTimeout(function() {
        id = requestAnimationFrame(gameLoop);
    }, 1000 / 12);

    updateSnakePositionAndLength();

    collisionDetection();

    renderEverything();
}
A possible "collision detector" if the snake ate an apple could look like this - we just need to check if the "snakes head" which is stored in snake[0] (x) and snake[1] (y) coordinates are the same of apple_x and apple_y. If so, we set the apple_eaten variable to true, so another "new" apple can spawn. Lastly, we set add up 1 to max_length_snake since the snake gets bigger after it ate an apple:
function collisionDetection()
        {
            if(snake[0] == apple_x && snake[1] == apple_y)
            {
                max_length_snake++;
                apple_eaten = true;
            }
        }
Test it, you will see it works like a charme. Our game is now finished, we only need to implemented the "Game Over" mechanics, otherwise the game would be extremely boring.
First, we implement a game_over variable and initalize it with false:
var game_over = false;And cancels the loop (gameLoop())if it is set to true - we can implement it like this:
function gameLoop()
{
    setTimeout(function() {
        id = requestAnimationFrame(gameLoop);
    }, 1000 / 12);

    updateSnakePositionAndLength();

    collisionDetection();

    if(game_over == true)
    {
        gameOver();
        return;
    }

    renderEverything();

}
It makes sense that this is implemented after the collisionDetection() function because this function is used to look if any "unwanted" collision happenend and if so, the variable game_over is set to true. The gameOver() function, just exits the loop using cancelAnimationFrame(id) and return and prints out a small "Game Over" Message in the middle of the game field:
function gameOver()
{
    context.clearRect(0, 0, canvas.width, canvas.height);
    context.fillStyle = 'black';
    context.fillRect(0, 0, canvas.width, canvas.height);
    context.fillStyle = 'white';
    context.font = '50px Times New Roman';
    context.fillText('Game Over', 140, 250);

    cancelAnimationFrame(id);
}
First of we implement the "if the snake touched any edge"-collision Detection (put this code into collisionDetection() after the snake-ate-apple implementation):
// check if snake colides with edges
if (x < 0)
{
    game_over = true;
}

else if (x >= canvas.width)
{
    game_over = true;
}

if (y < 0)
{
    game_over = true;
}

else if (y >= canvas.height)
{
    game_over = true;
}
You might have asked, why the snake can go "outside" the game field. This is because the pixels can be also negative. Here we look if the snake is still in the game field.
Lastly, we implement the "snake eats itself" mechanic. It will check if any snake block collides with another snake clock (add this again in the collisionDetection() function):
//                                       x           y
// the 'front' snake head is always in snake[0] and snake[1]
// check if any of those colides with next x/y (e.g. snake[2] and snake[3])

for(let i = 2; i < snake.length; i+=2)
{
    if(snake[0] == snake[i] && snake[1] == snake[i+1])
    {
        game_over = true;
    }
}
Also, we still can move to the left while the snake is moving right and vice versa (or moving down while the snake is moving up and vice versa). To fix this, we just need to modify our eventHandler a little bit:
// Event Listener, just put at the end of JavaScript
// it 'always listens', when we push a button
document.addEventListener('keydown', function(e) {

    // left arrow key
    if (event.which === 37 && right == false) {
        left = true;
        right = false;
        down = false;
        up = false;
    }
    // up arrow key
    else if (event.which === 38 && down == false) {
        left = false;
        right = false;
        down = false;
        up = true;
    }
    // right arrow key
    else if (event.which === 39 && left == false) {
        left = false;
        right = true;
        down = false;
        up = false;
    }
    // down arrow key
    else if (event.which === 40 && up == false) {
        left = false;
        right = false;
        down = true;
        up = false;
    }
});Finally, if you came this far you have successfully made a small implementation of snake using (pure) JavaScript!
Chapter 3: Conclusion and important Notes
You learned, how game loops (can) work. Got your attention? Of course you can modify the files as you like, things you might wanna add:
- A score system
- aestethics improvement
- mobile support
- You don't loose if you touch the wall, instead your snake appears on the "other side"
- let the apple spawn to another location, if the snake was too slow to catch it in time
- The apple sometimes spawns at the same location (pixels) as the tail of the snake ("spaw fix")
I implemented some of this in my own project (like a score system, mobile support, apple "spaw fix" and some aestethics) - you can play/get my version of the game and its source files here. These are some ideas I came up with, of course you can make whatever you want.
Important Note: In this project we (almost) solely used global variables only, since it just made the structuring of the functions for beginners simpler (we didn't need parameters etc.) in my opinion. Yes you could have written everything in a single function, but then our code would have looked very very ugly and unstructured - this is why i decided to do it this way. BUT as a (serious) programmer you should avoid using global variables (unless there is a very good reason) and instead use local variables and learn the "concept" of passing/returning variables. More infos about global and local variables can be found here or here or here.
<canvas> is a real powerful tool, you can do so much more (e.g. load sprites, make more elements etc.). You could easily make a Tetris-clone or your own version of Breakout.
But after some time, you will realize that it's not that easy to make more complicated games "from scratch". That's where you should consider switching to a framework like Phaser or other frameworks. It is a framework for canvas (and WebGL). The Phaser Framework is just a framework I know "best" because normally I don't really code in JavaScript. My prior programming language is C/C++. So if you think my code is somehow "bad" keep in mind that I am not a JavaScript-Pro. Nonetheless, I hope you enjoyed this little tutorial - if so, hit me up on Twitter and send me some feedback! Furthermore, I think I underestimated the workload a little bit… seriously, it was a lot of work…
Chapter 4: Source Code
A finalized version can be found on github.
Chapter 5: Bug Report
If you find any bugs, please let me know on Twitter or write me an E-Mail.
Footnotes
Solution task 1: 1|4 1
Solution task 2: 100|60 2
Further information to the .unshift() method here.3
This document was converted from Markdown to HTML using showdown which is licensed under MIT.